keen to share you latest gaming achievements with the world but not sure how to share a screenshot from your Switch to your phone? Here is the simplest way to send a screenshot taken on your Nintendo Switch to your phone.
There are so many interesting and beautifully drawn games available on the Nintendo Switch. And anyone who owns a Switch may have noticed the ability to take screenshots, allowing users to save images from their playthrough.
If you’re interested in learning how you can send these Switch screenshots over to your mobile device, make sure you keep reading, as we’re going to run through the simplest way to access these pictures on your mobile.
What we used
The Short Version
- Click on Album on your Switch
- Choose a photo you want to send
- Click A
- Press Send to Smart Device
- Press Send Individually
- Scan the first QR code
- Scan the second QR code
- Click on the photo
- Hold down on the picture
- Press Add to Photos
-
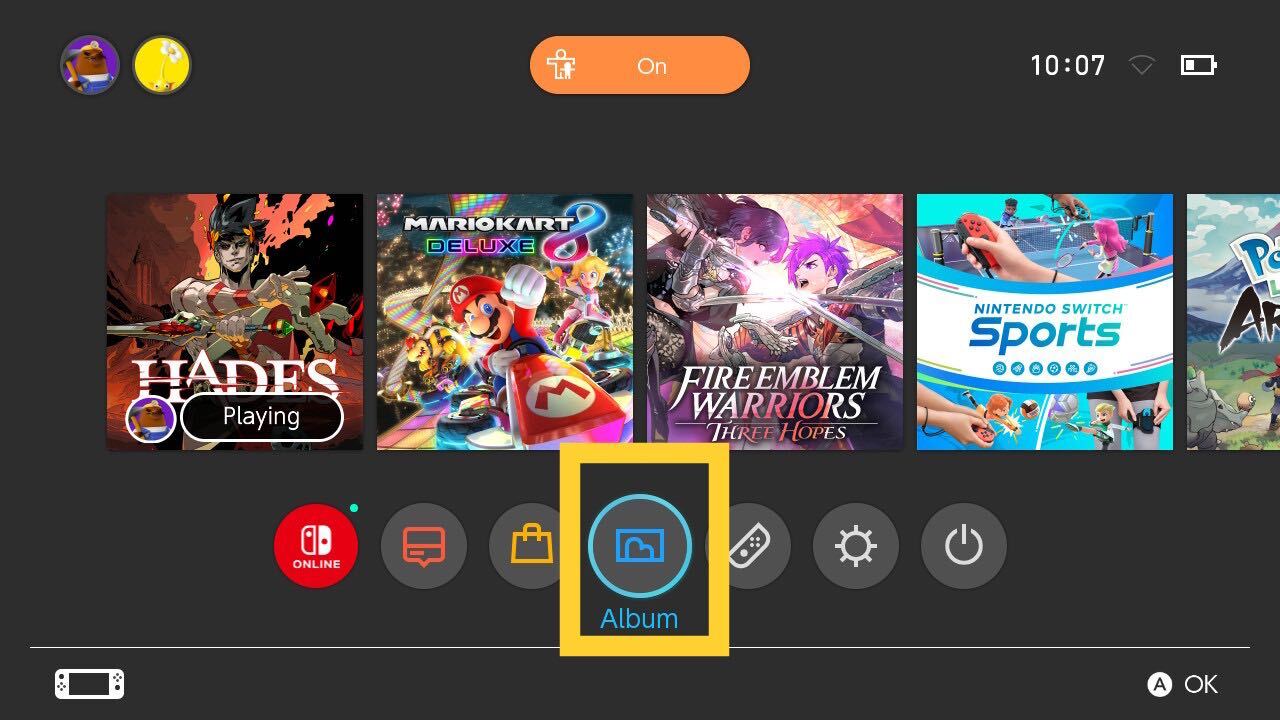
Step
1Click on Album on your Switch
Turn on your Switch and click on the button called Album.
-
Step
2Choose a photo you want to send
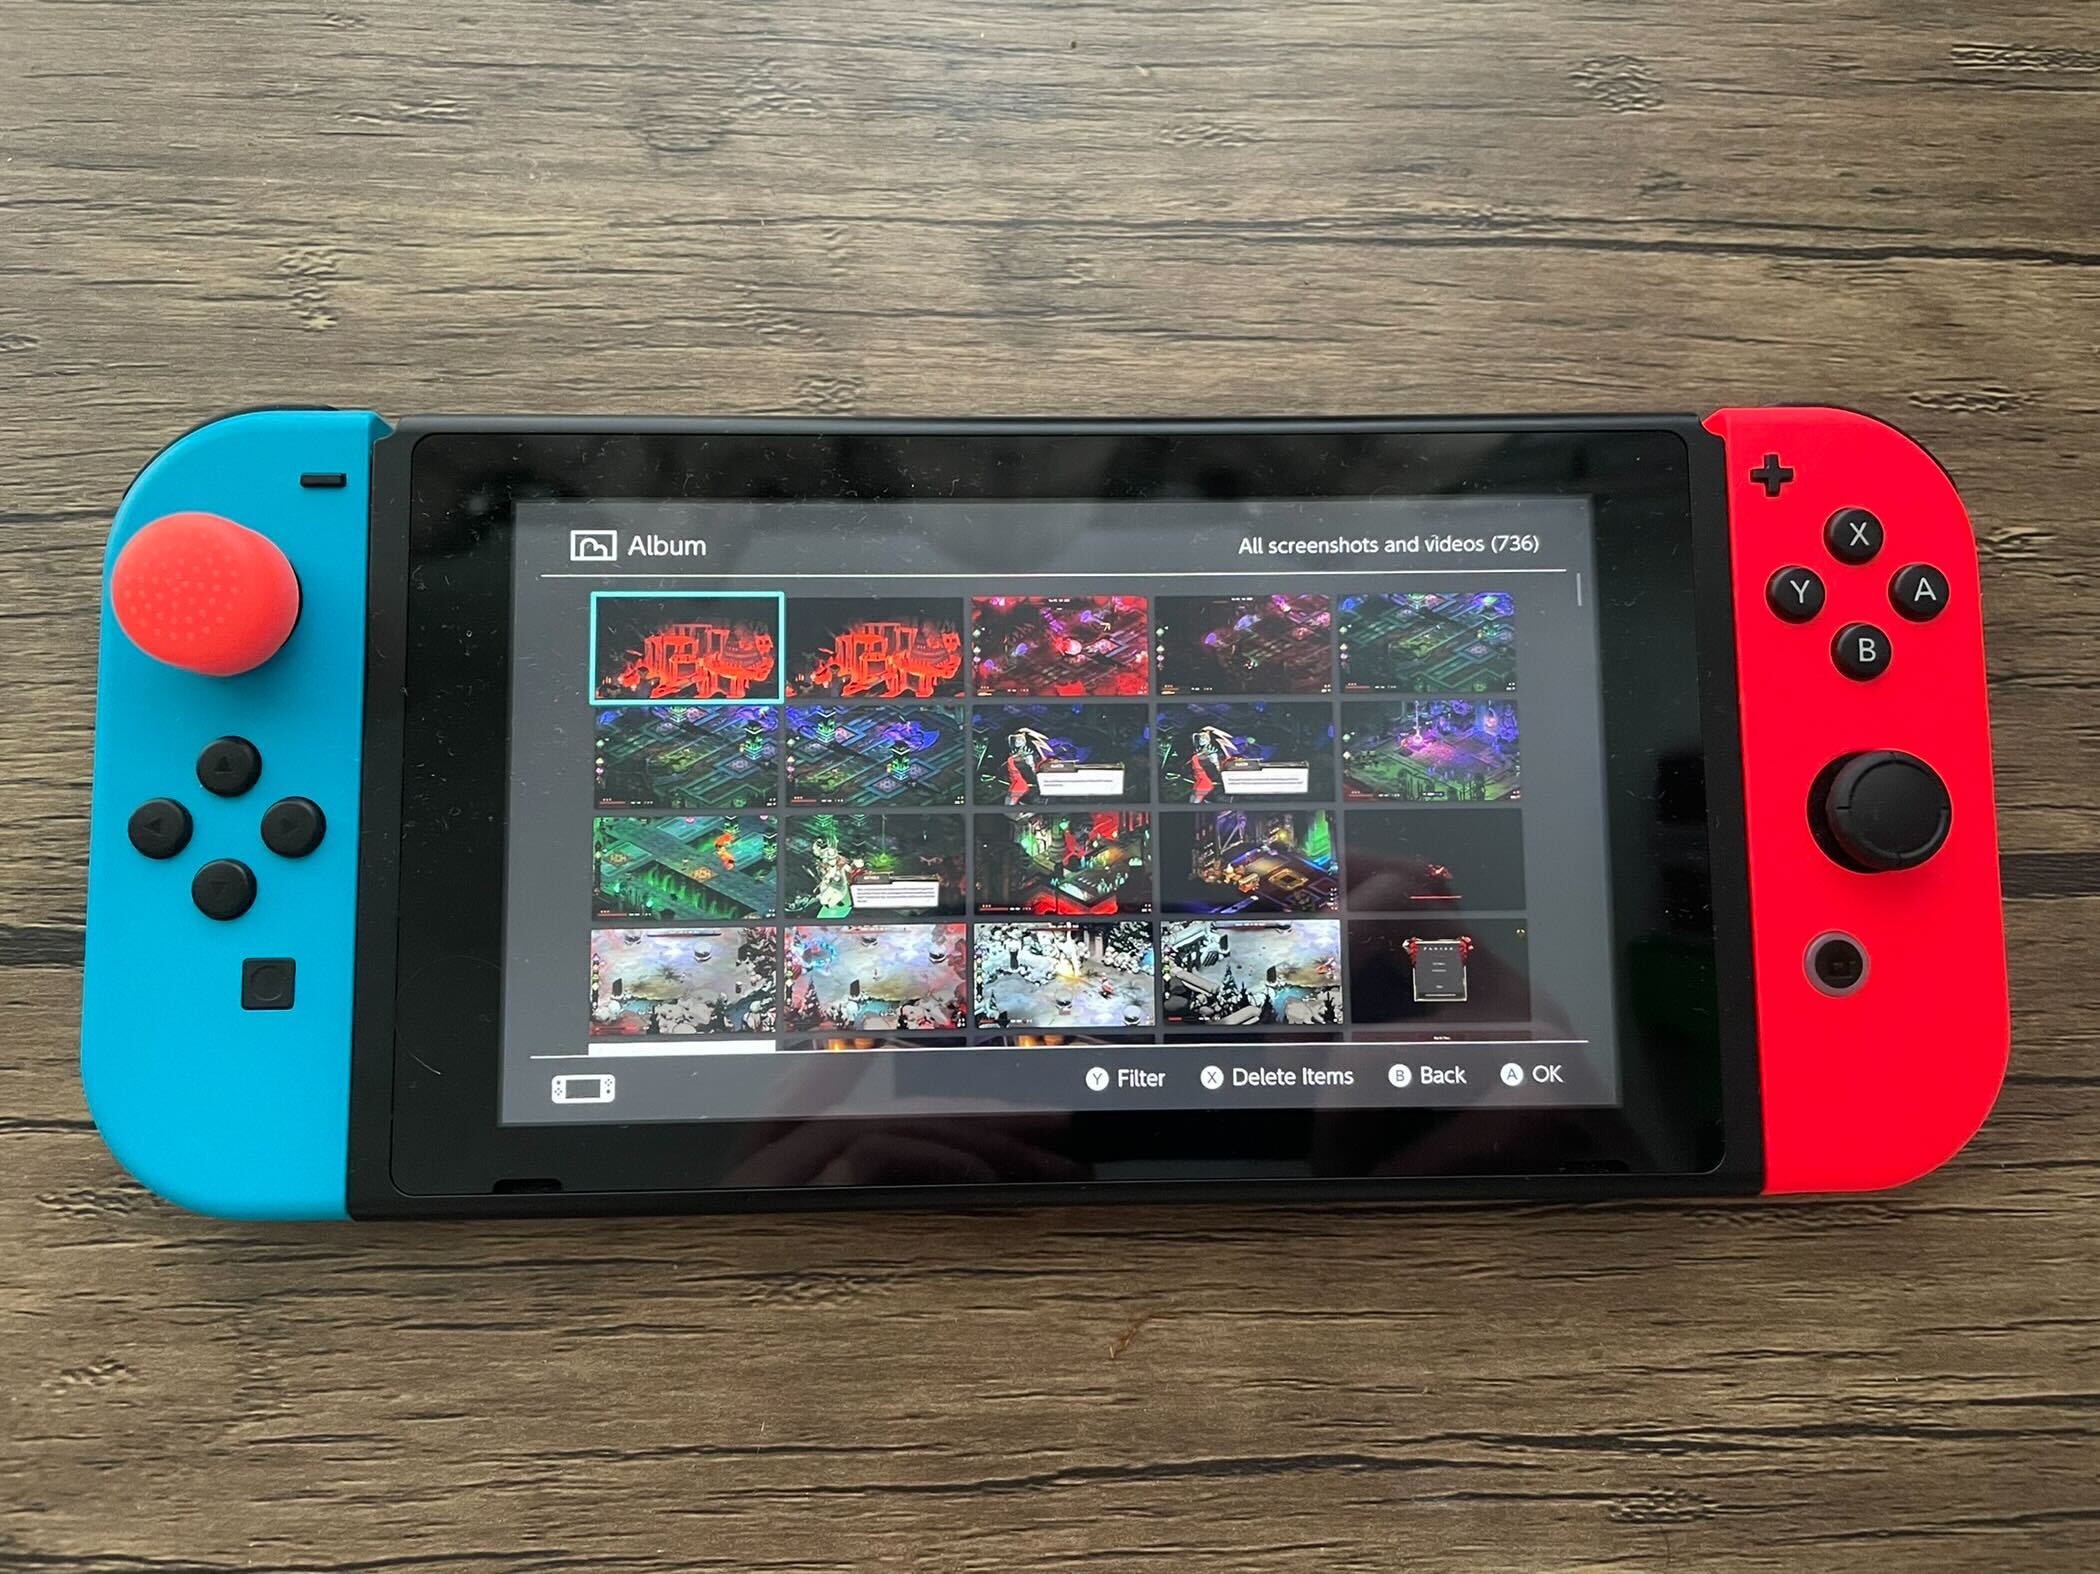
Out of all the pictures in your Album, click on the picture you want to send.
-
Step
3Click A

Press the A button to continue.
-
Step
4Press Send to Smart Device

Out of the options presented on the new menu, click Send to Smart Device.
-
Step
5Press Send Indiviually
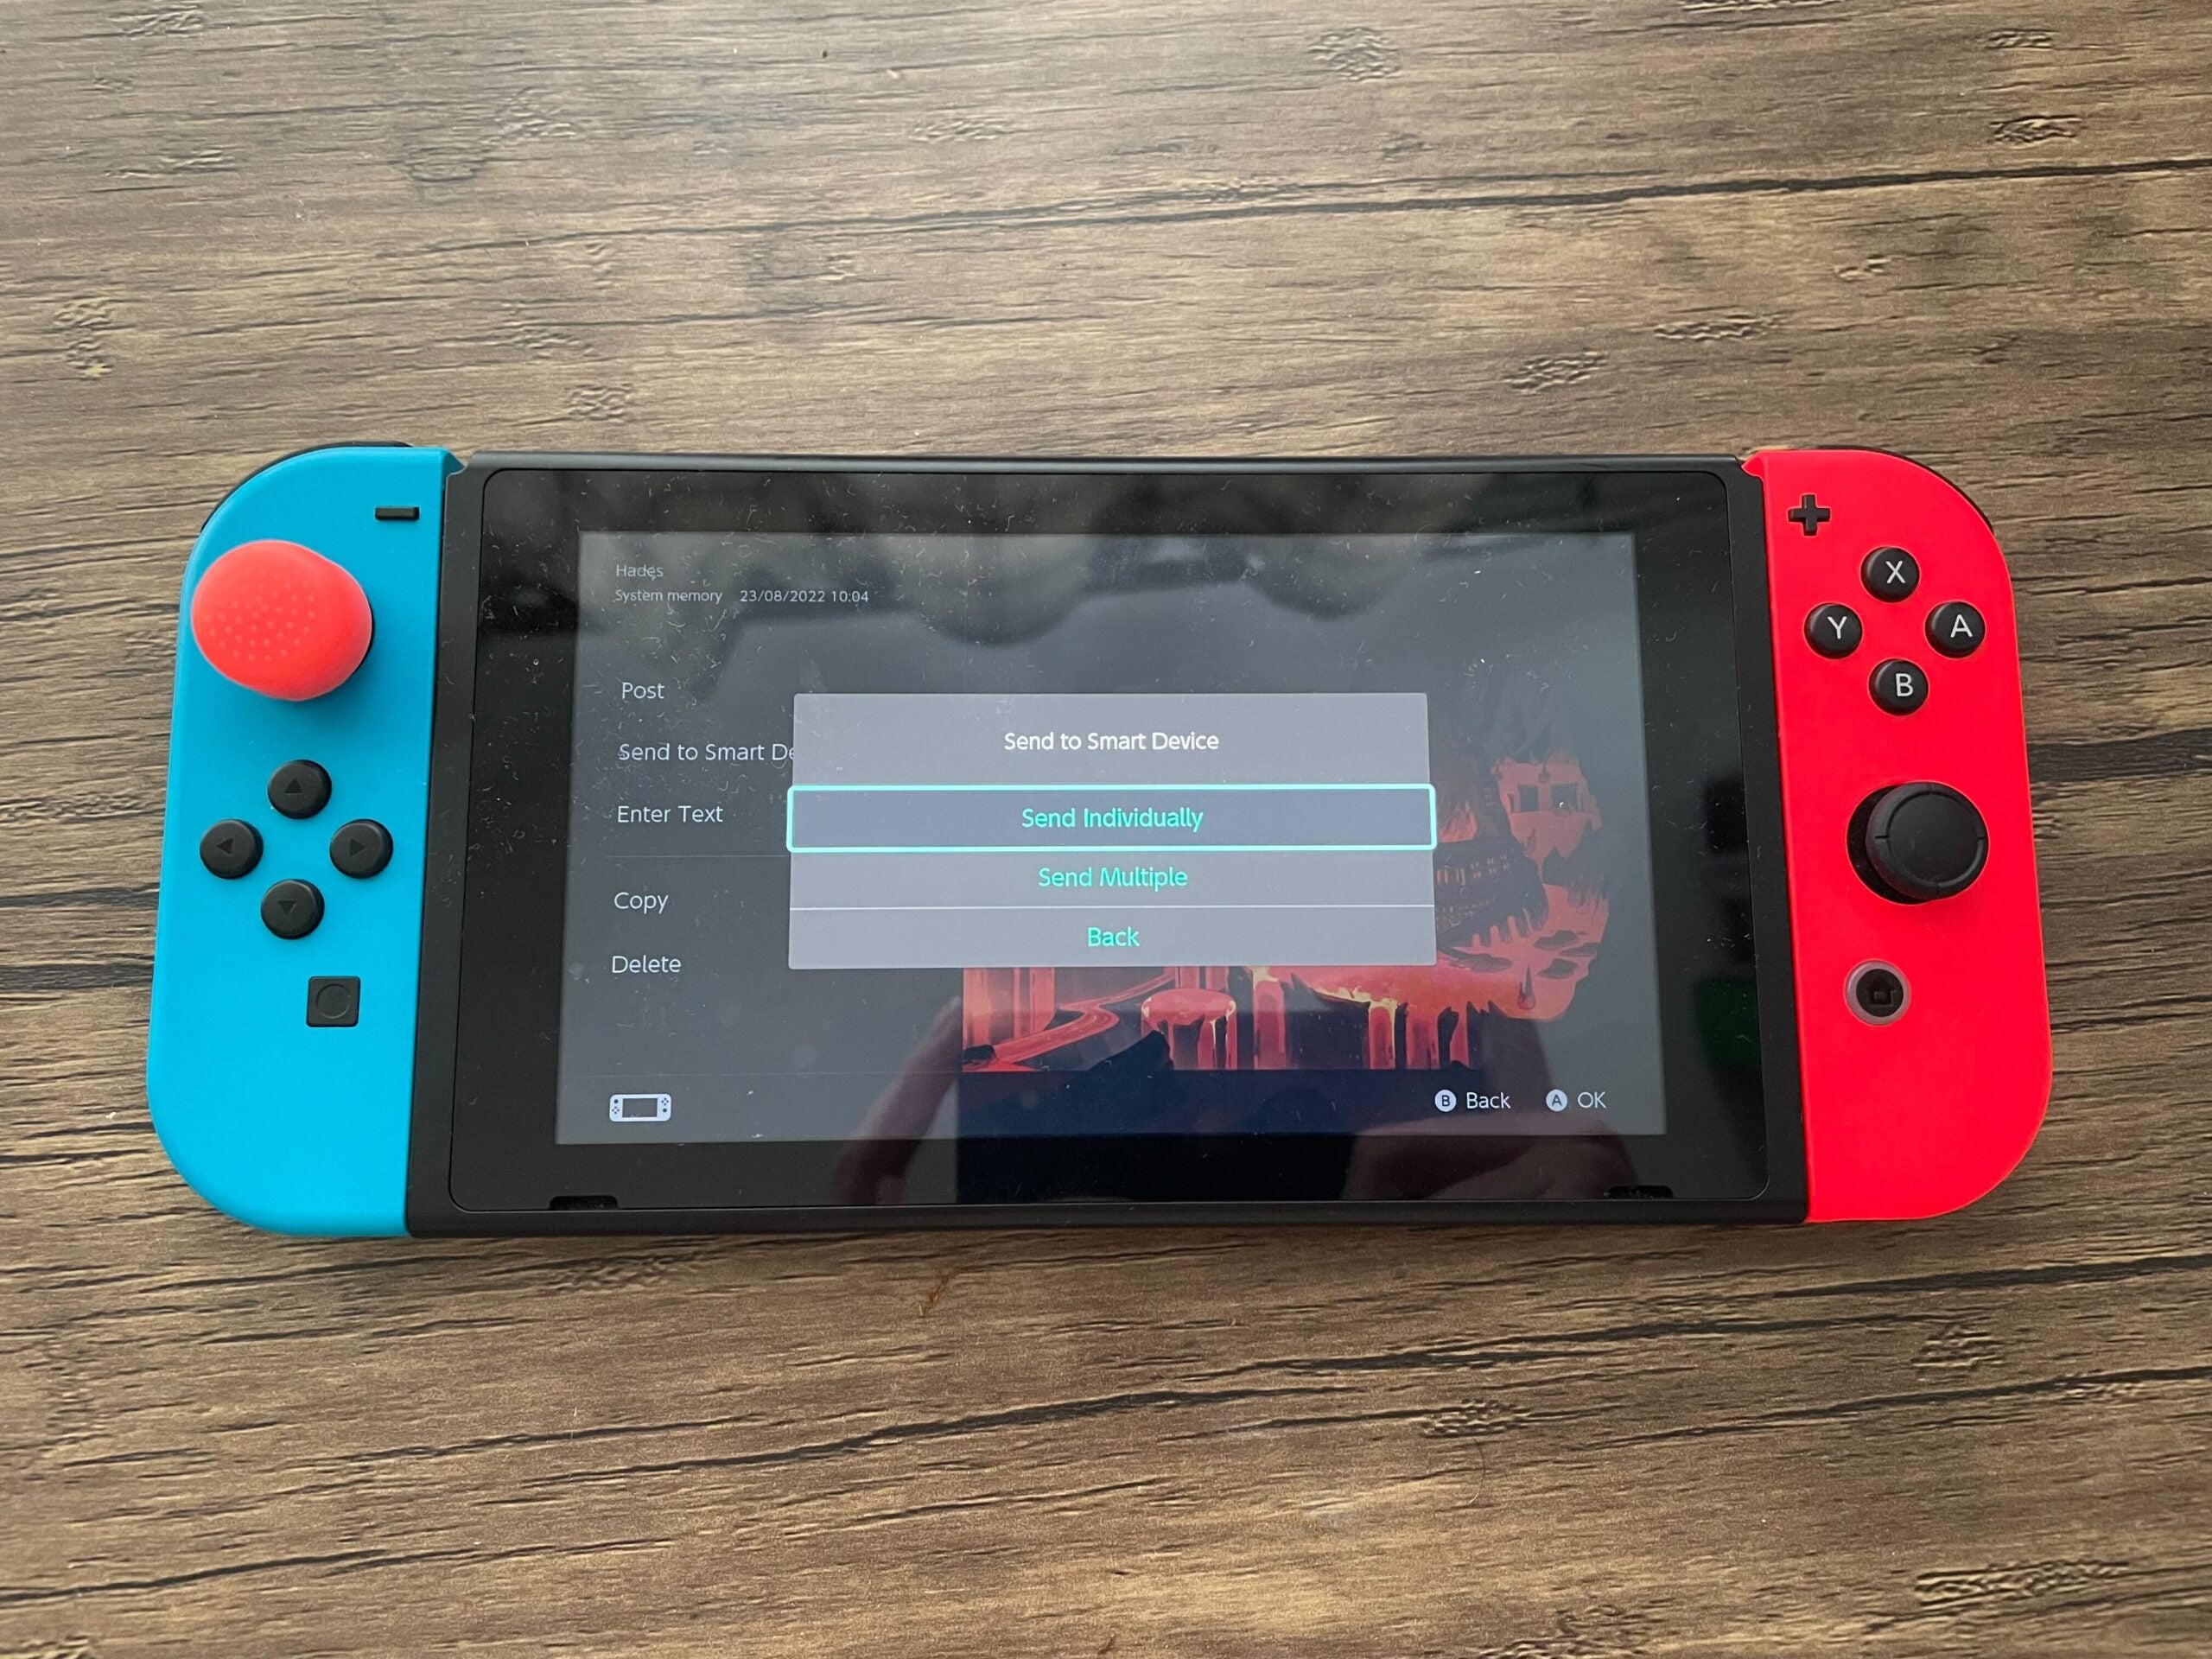
Click on the button that says Send Individually. If you want to send multiple pictures over instead, you can also select this option and choose more photos, the remaining instructions will still apply.
-
Step
6Scan the first QR code
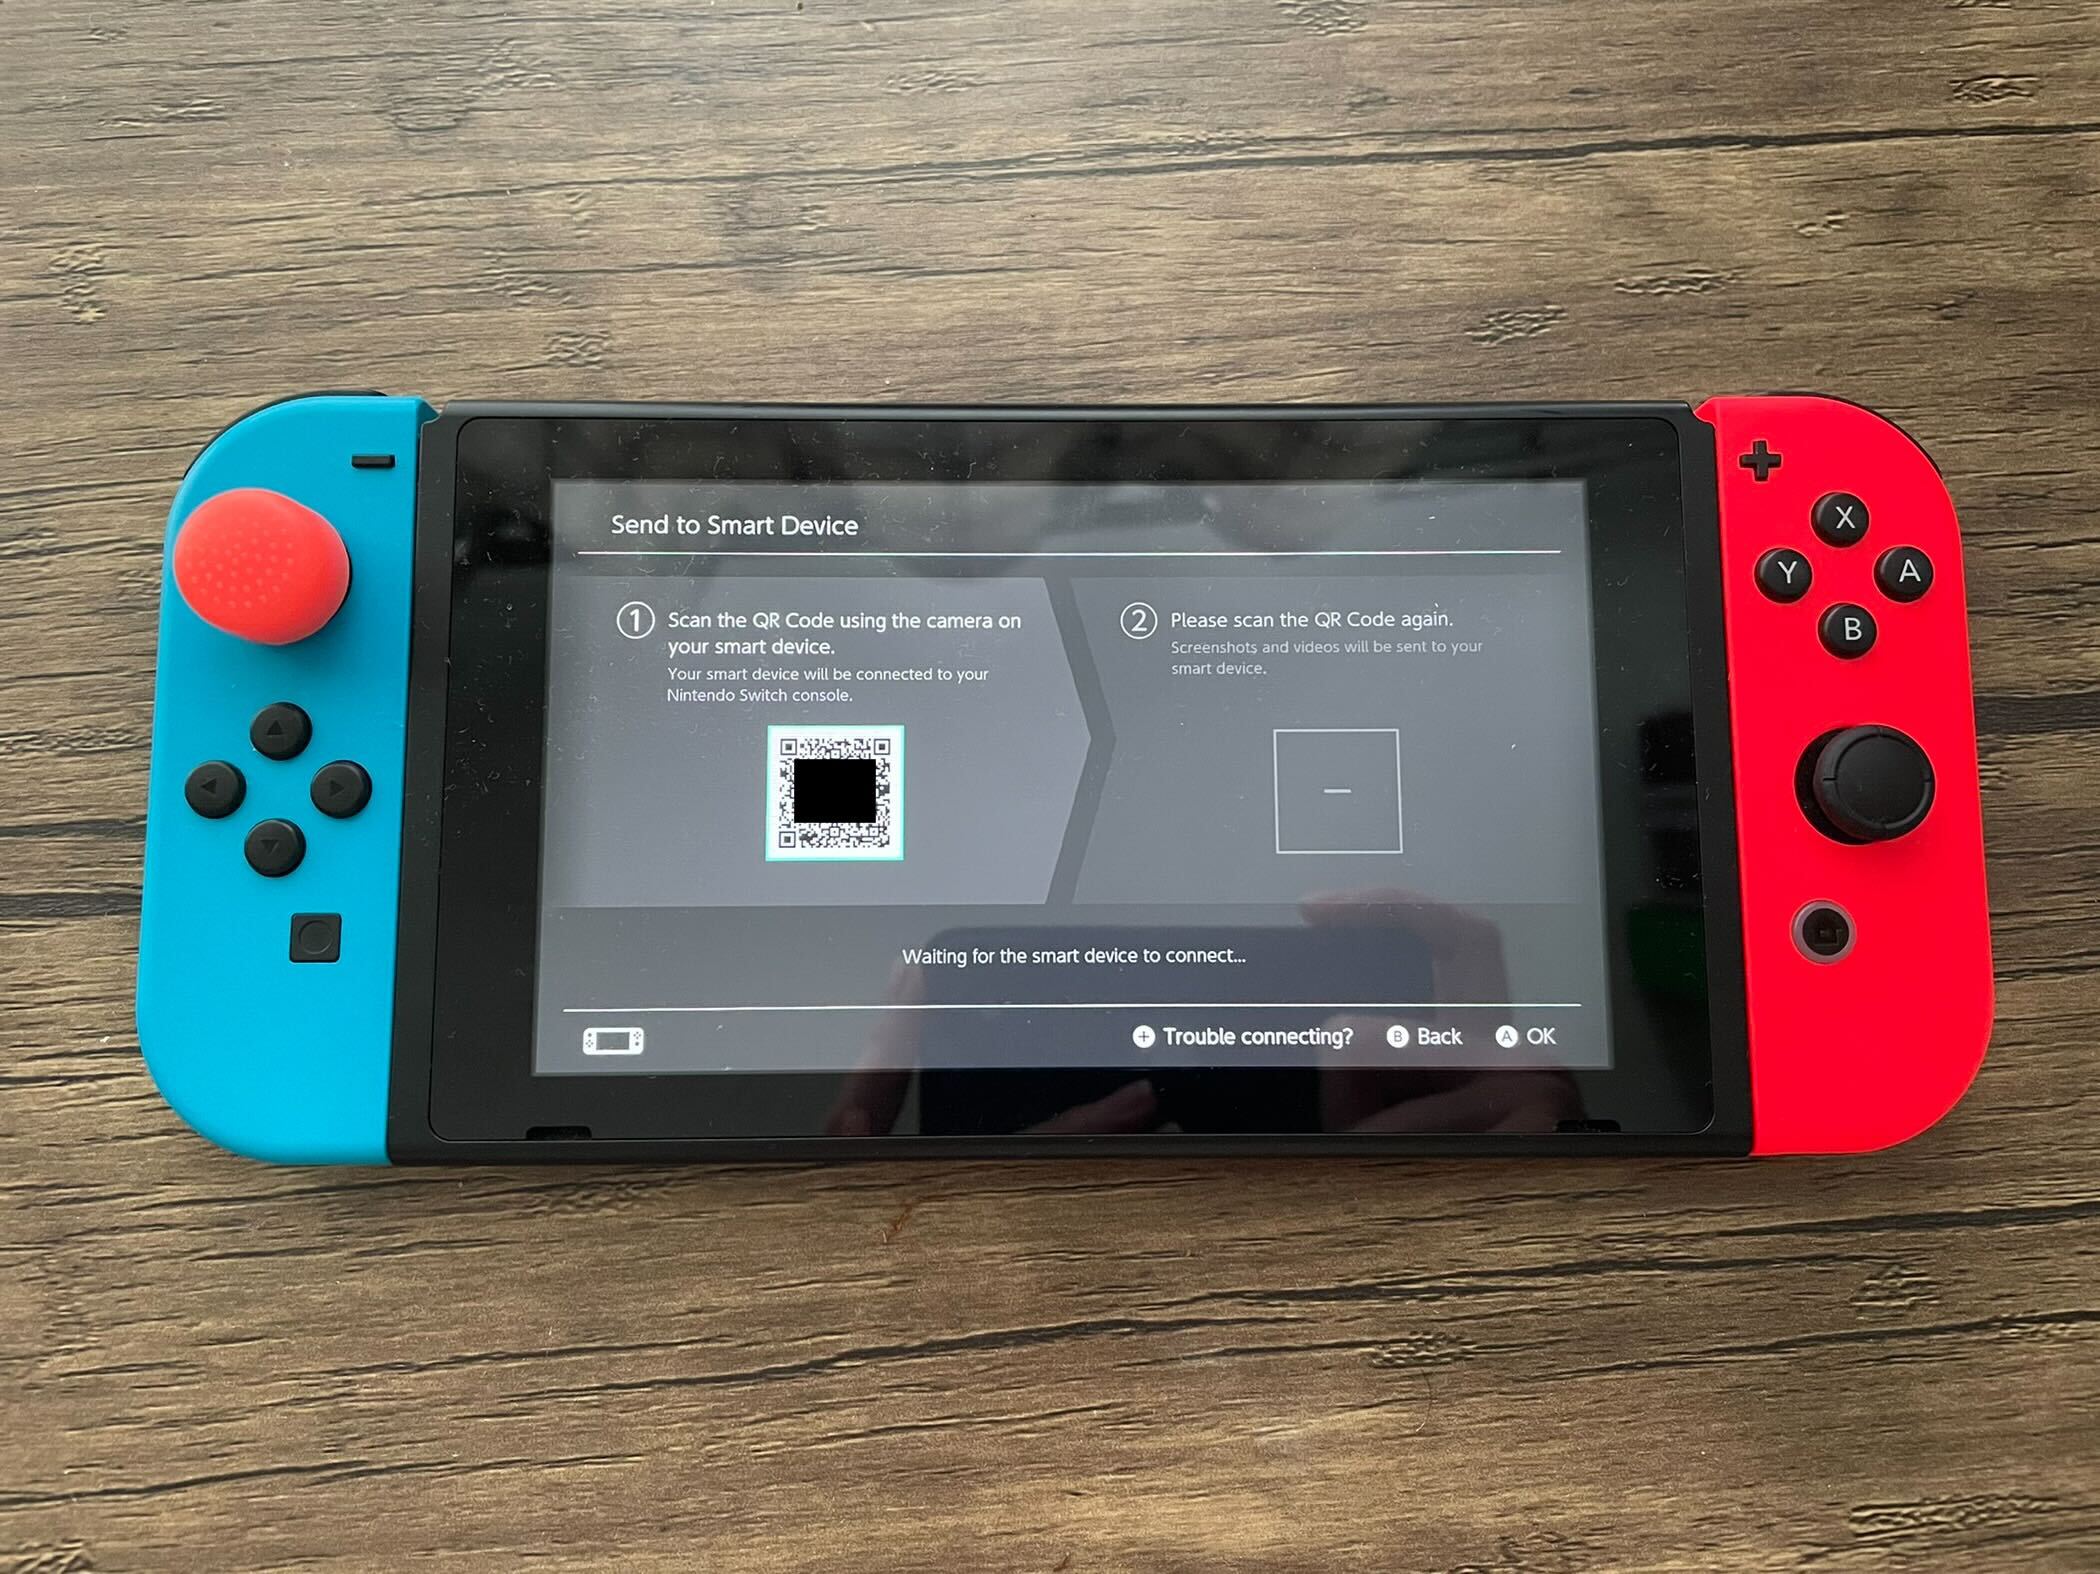
Use the phone you want to send the pictures to scan the first QR code presented on the screen.
-
Step
7Scan the second QR code
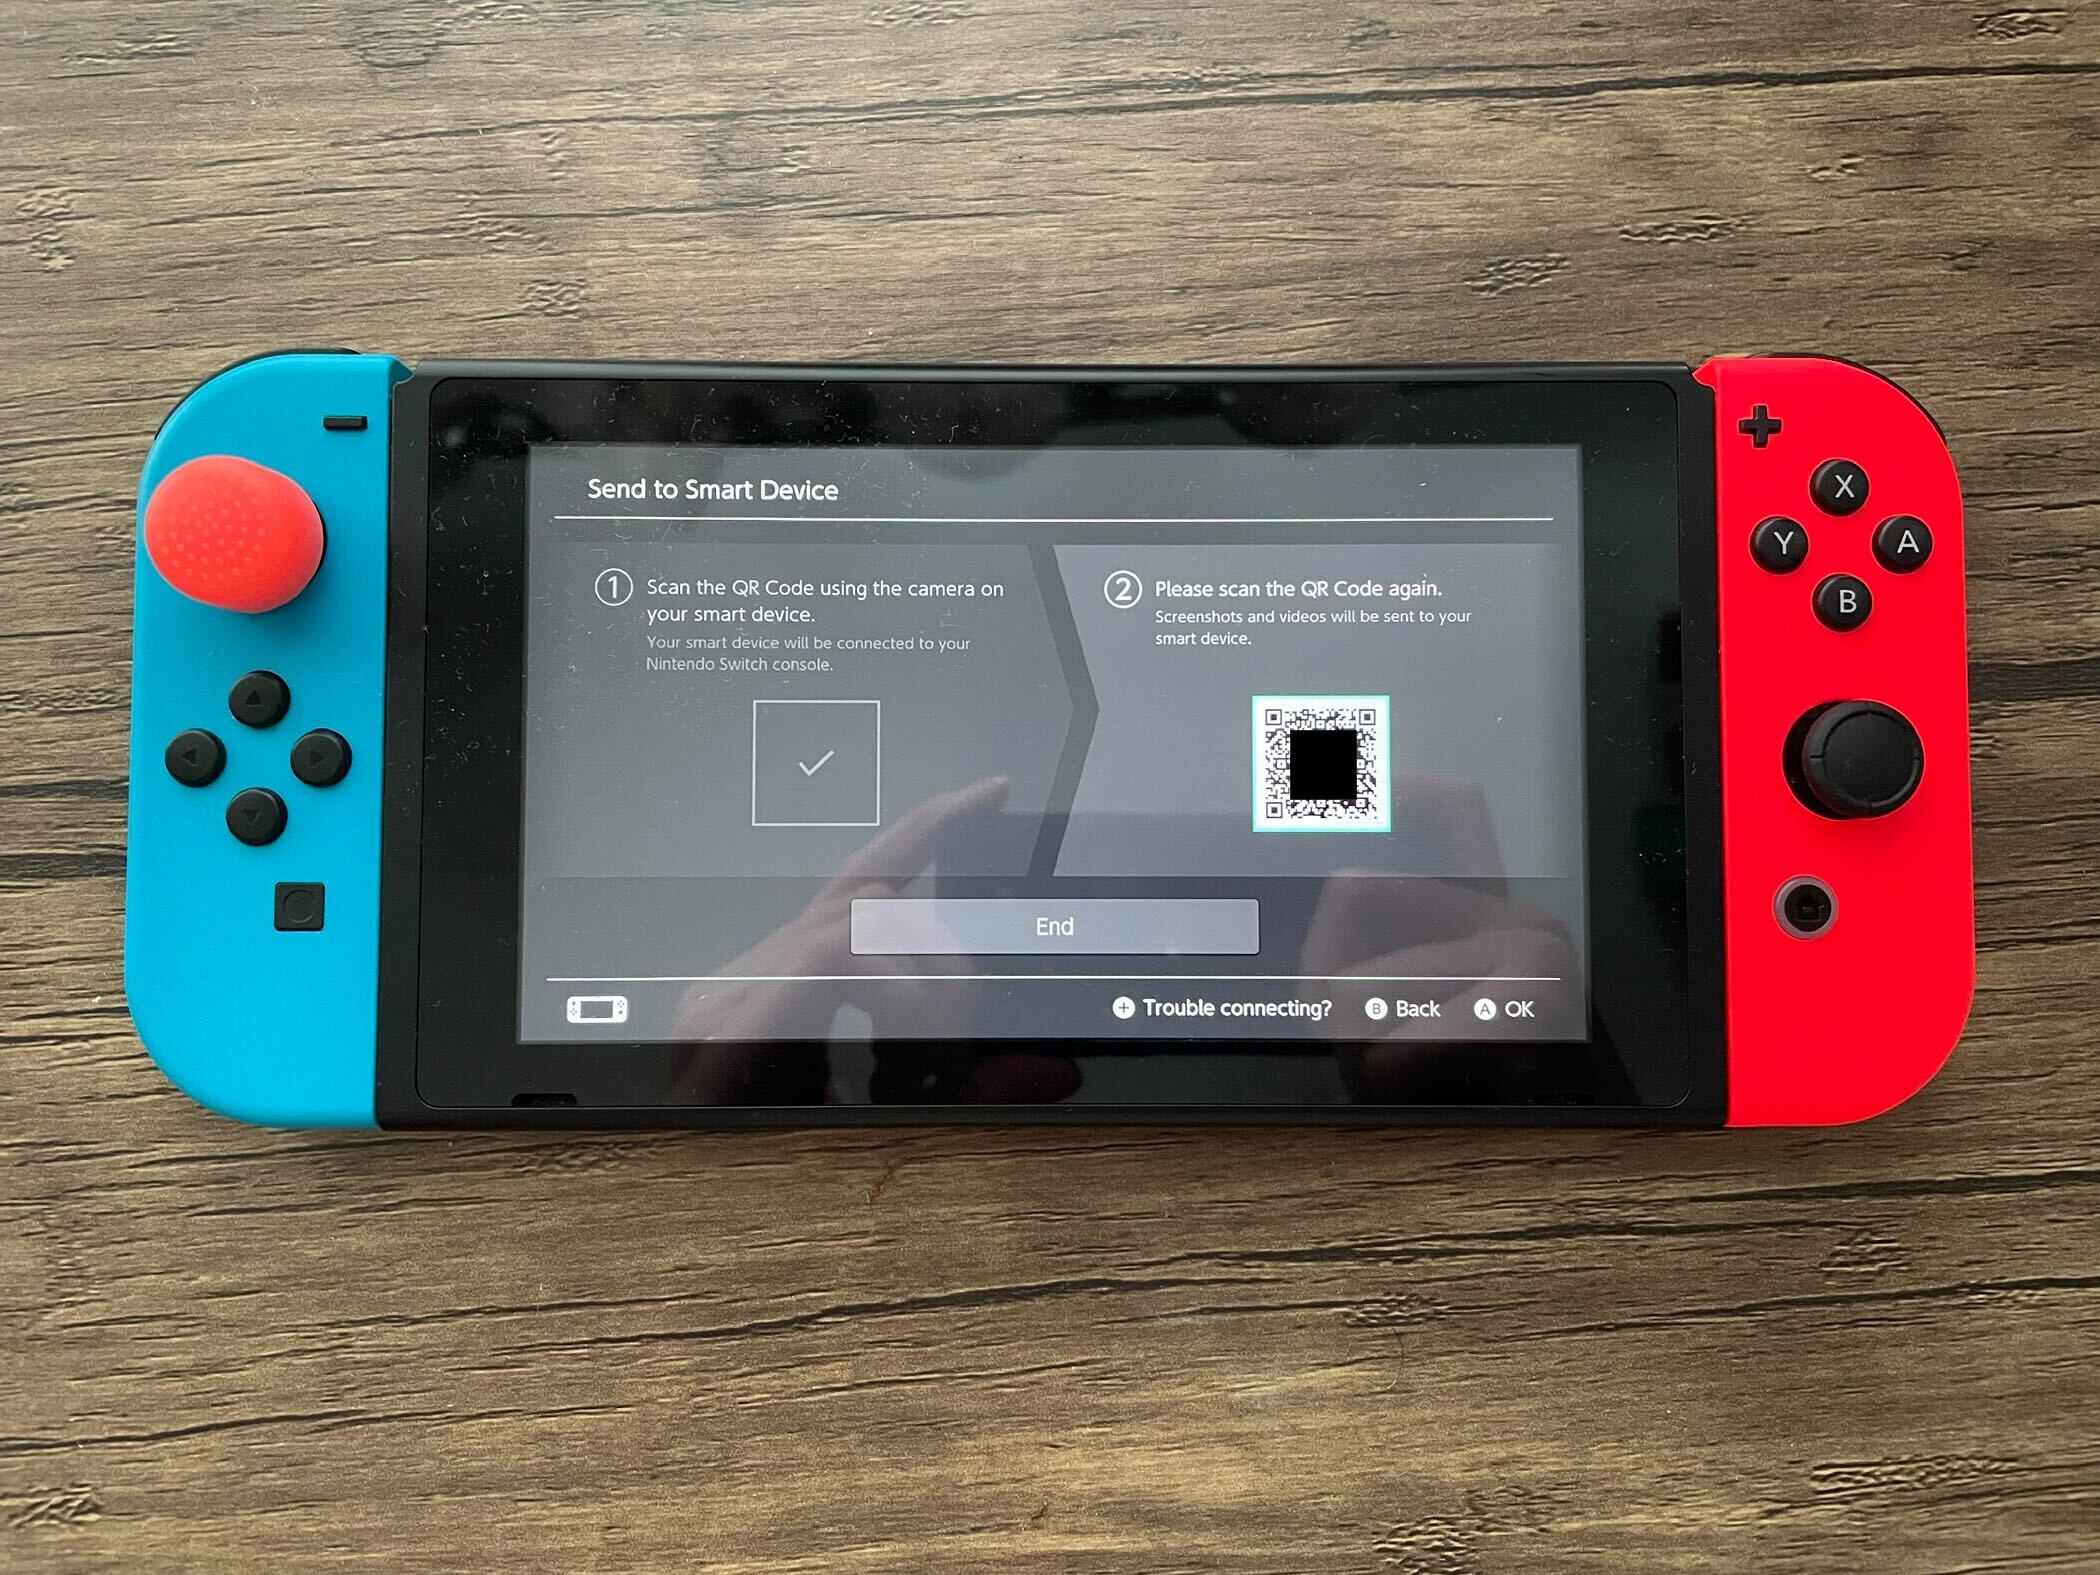
If you wait a few seconds, your phone should connect to your Switch. After that has been done, a second QR code will appear on screen. Scan this code too.
-
Step
8Click on the photo
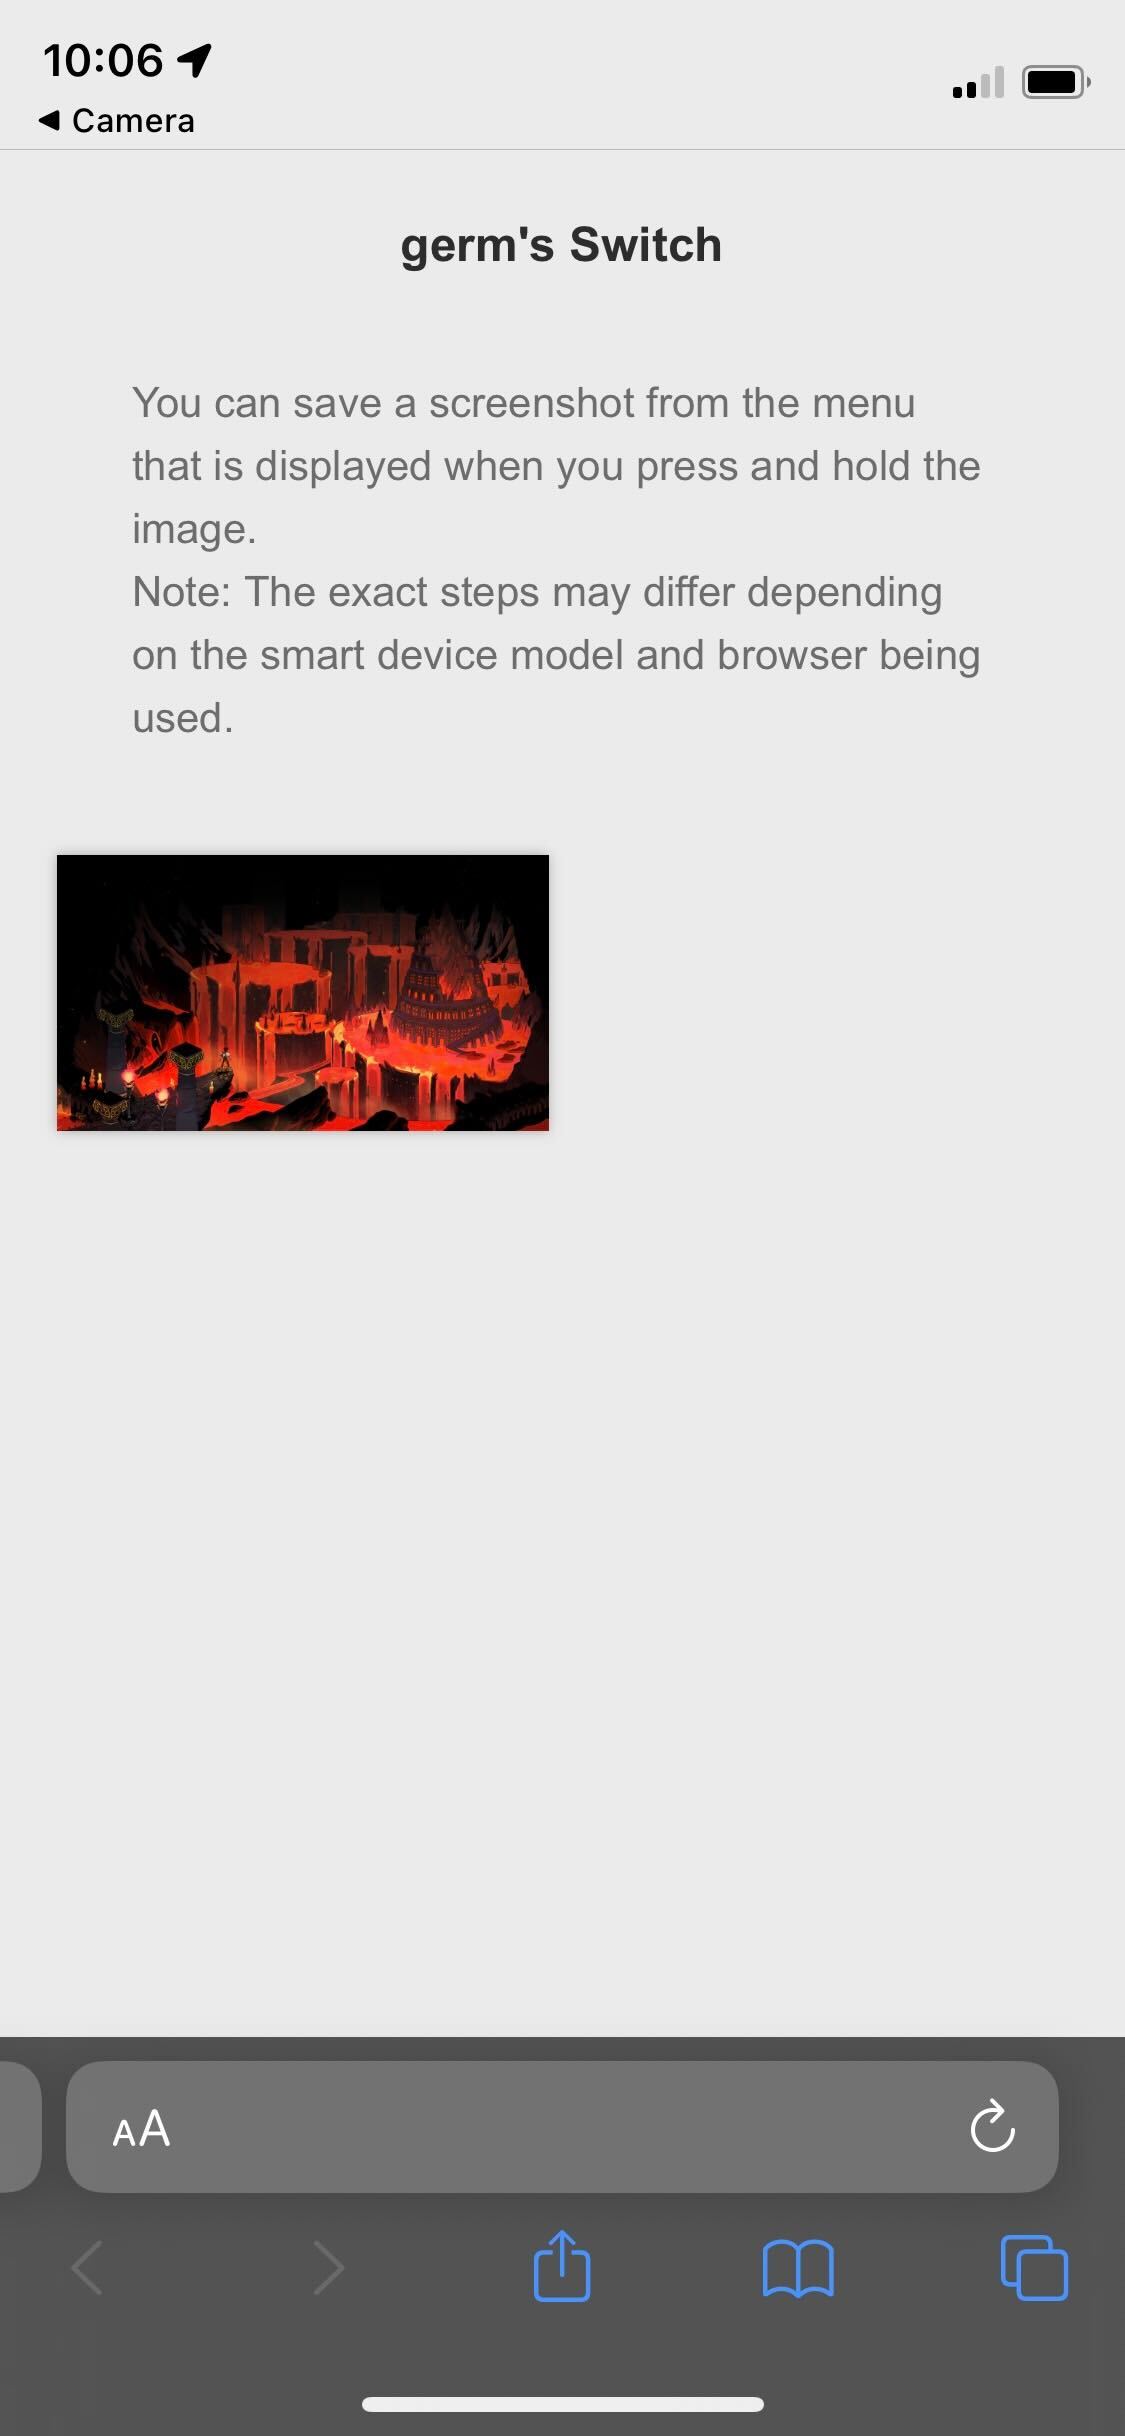
Turning to your phone, click on the photo that has been sent to you. As noted in the photo, this may differ depending on which phone you use, but for iPhone, you can simply hold down on the image when you press on it, as we will show in the next two steps.
-
Step
9Hold down on the picture

Hold down on the image.
-
Step
10Press Add to Photos
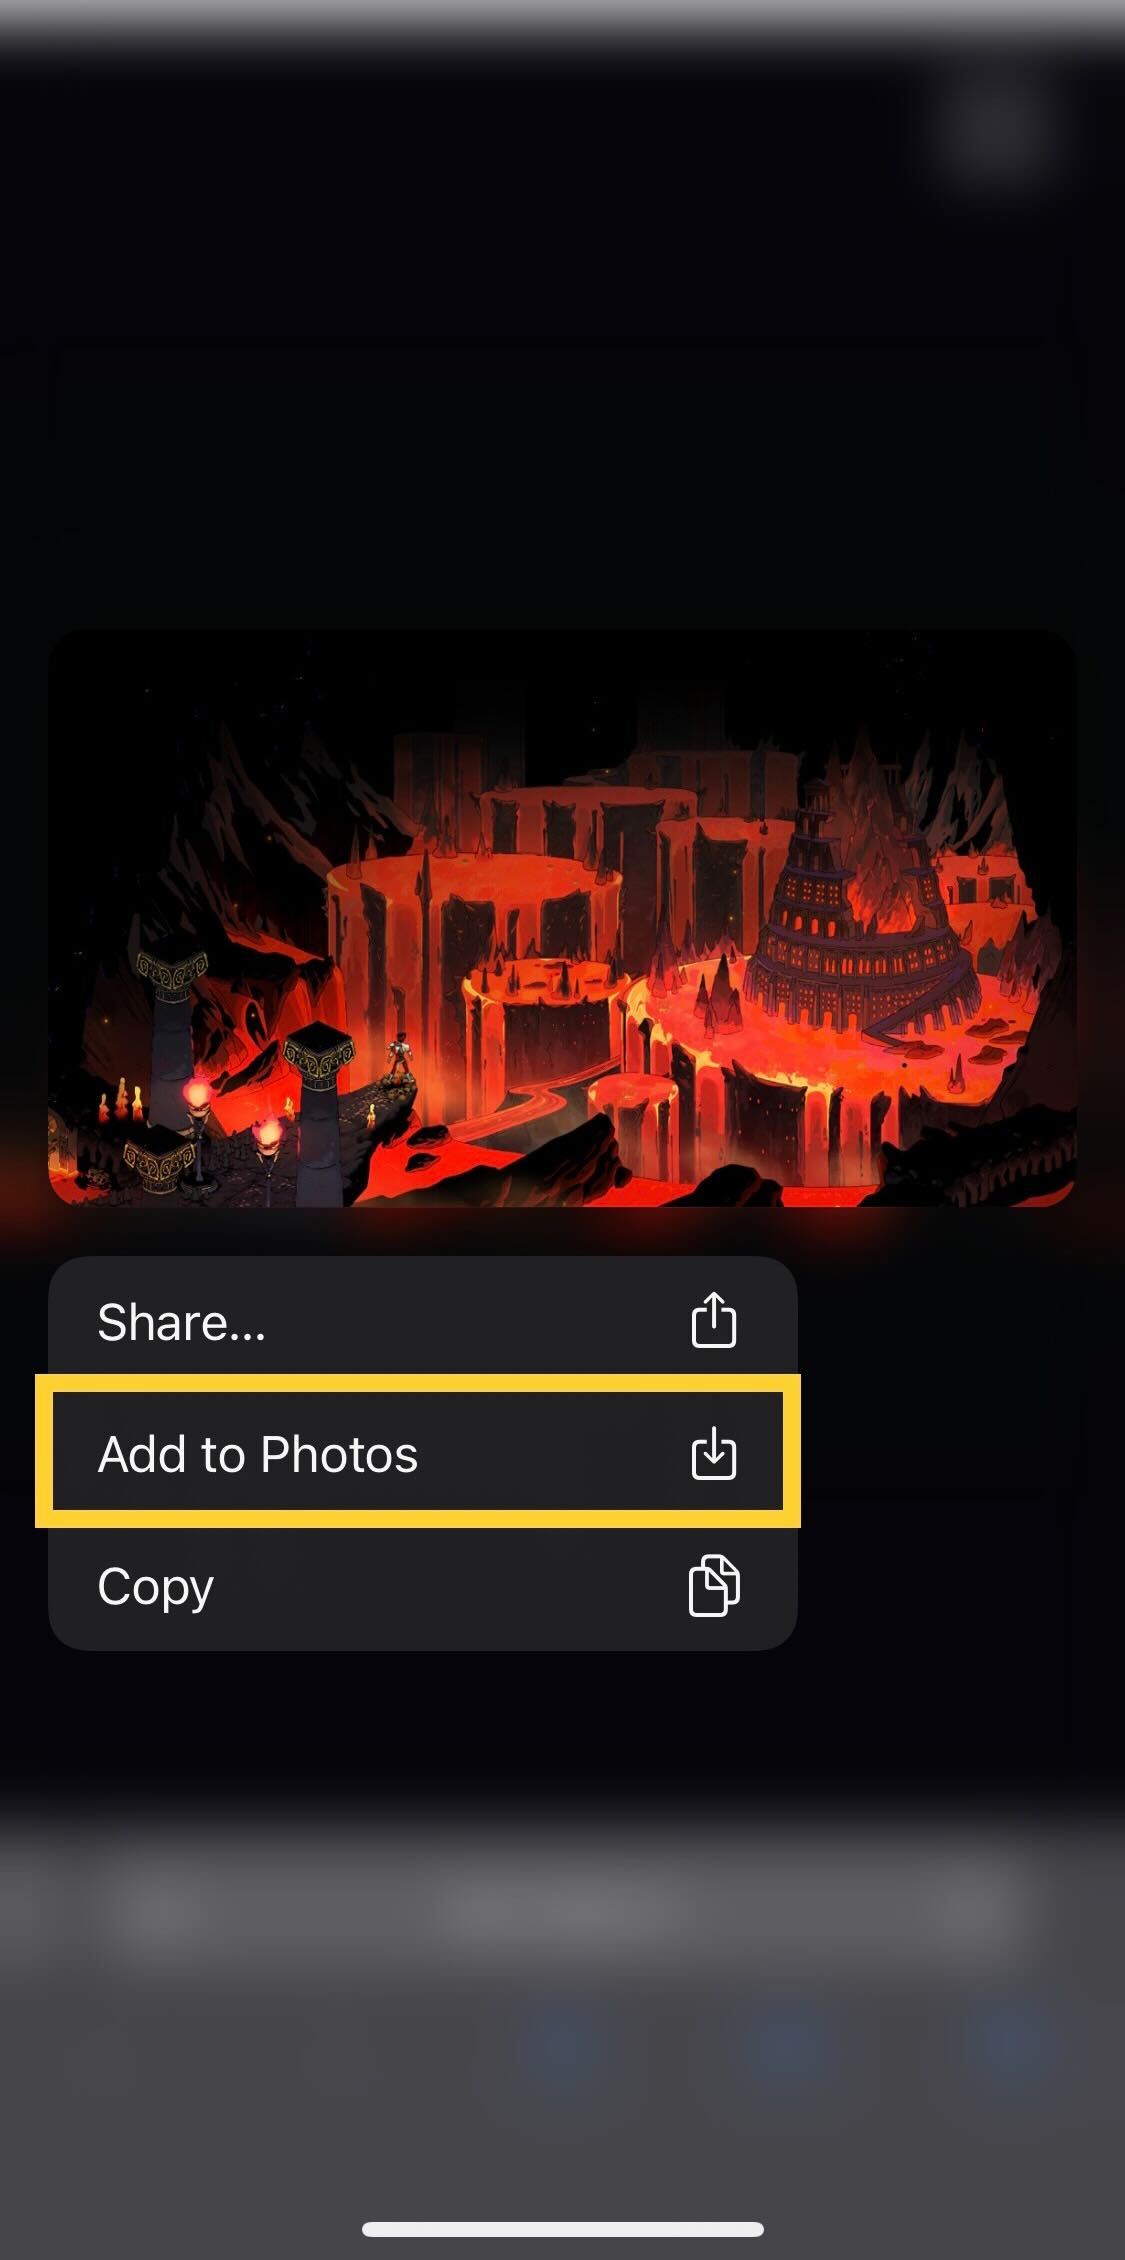
From the small drop-down menu that appears, click on the button that says Add to Photos. It then should appear in your photo album.
Be the first to comment